Table of Contents
If you’re on a keto diet but can’t eat nuts, this low-carb pie crust is your new best friend. It’s not just nut-free; it’s also incredibly easy to make and versatile enough for a variety of dishes. Whether you’re craving a classic Pumpkin Pie or a savory quiche, this keto nut-free pie crust has got you covered.
Why You’ll Love This Recipe
- Nut-Free and Gluten-Free: Ideal for those with allergies or sensitivities.
- Low-Carb and Diabetic-Friendly: Fits perfectly into your keto or low-carb diet.
- Versatile: Works well with both sweet and savory fillings, and even no-bake options.
Ingredients & Substitutions
Heads up: For exact measurements, see the recipe card below.
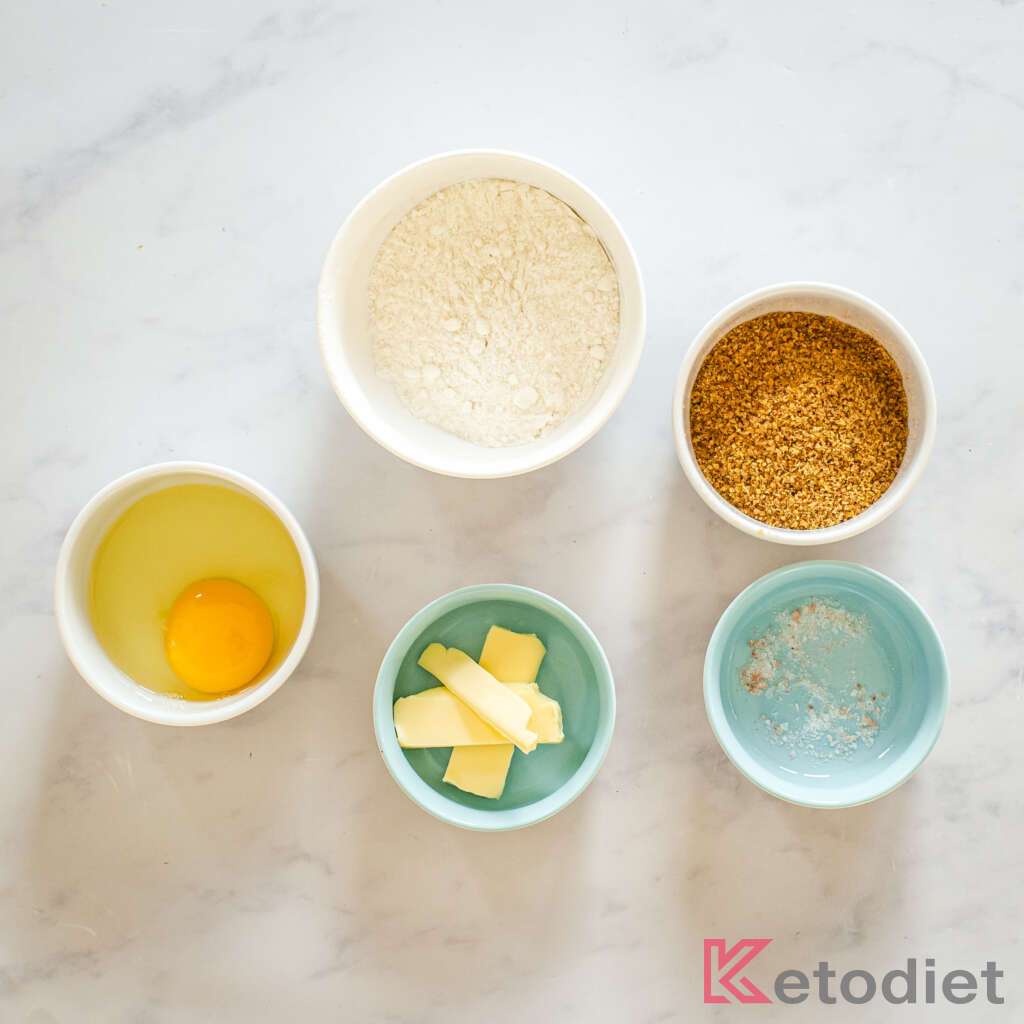
Here’s what you’ll need to make this nut-free, low-carb pie crust:
- Coconut Flour: Provides structure and a mild, coconut flavor.
- Flax Meal: Adds fiber and helps bind the ingredients.
- Sea Salt: Enhances flavor.
- Butter: Adds richness and moisture. Alternatively, ghee or coconut oil can be used.
- Eggs: Acts as a binding agent.
Coconut flour is essential for this recipe to keep it low-carb and nut-free. If you can eat nuts, you can use almond flour and make this flaky low-carb 5-Ingredient Keto Pie Crust instead.
Yes, you can substitute the butter with coconut oil, or ghee which is usually well tolerated.
How to Make Nut-Free Keto Pie Crust
Follow these simple steps to create a delicious, nut-free pie crust that’s perfect for your next pie or tart.
Combine Dry Ingredients. Start by preheating your oven to 320°F (160°C) if it’s fan-assisted, or 355°F (180°C) for conventional ovens. In a mixing bowl, thoroughly combine the coconut flour, flax meal, and a pinch of sea salt. This blend will serve as the base for your crust, providing both flavor and structure.
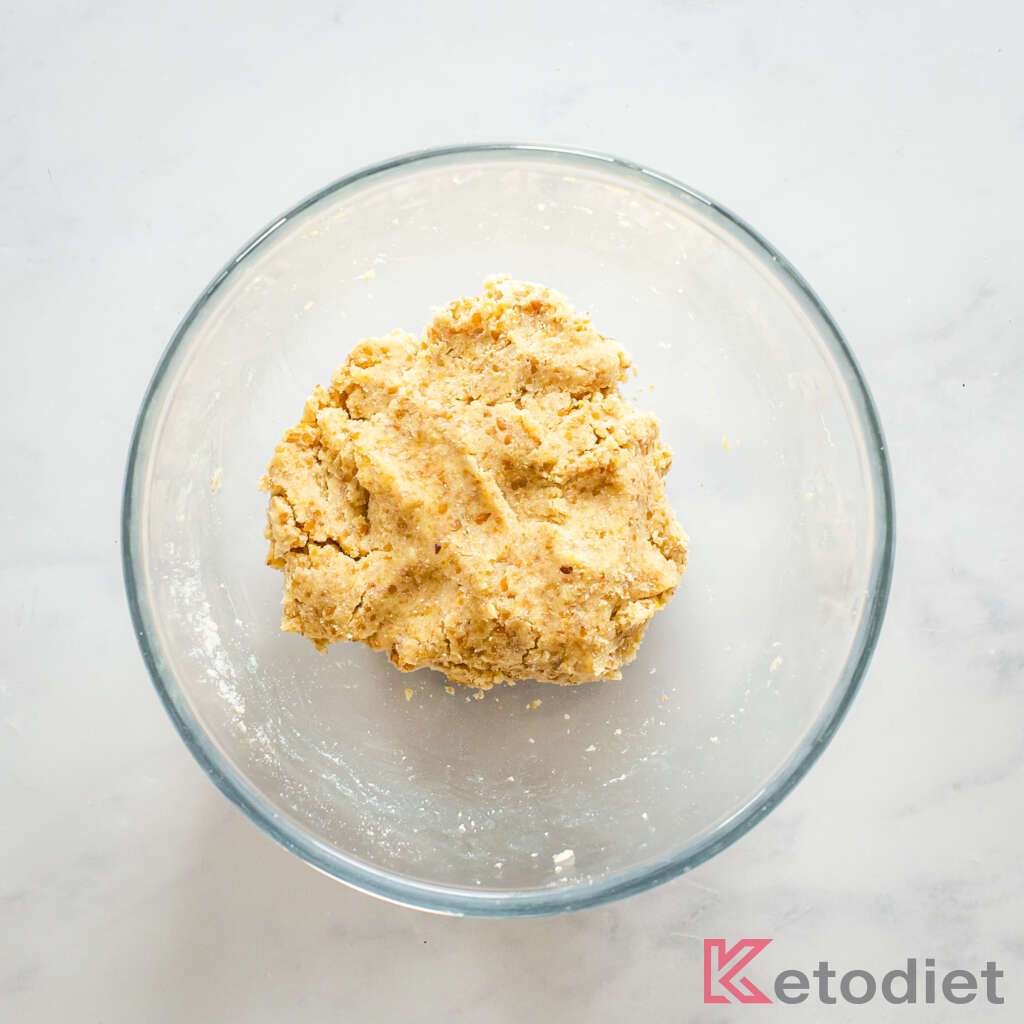
Add Wet Ingredients. Next, add the softened butter and a large egg to the dry mixture. Use a spoon or your hands to mix everything until a thick, sticky dough forms. The butter adds richness, while the egg acts as a binding agent to hold the crust together.
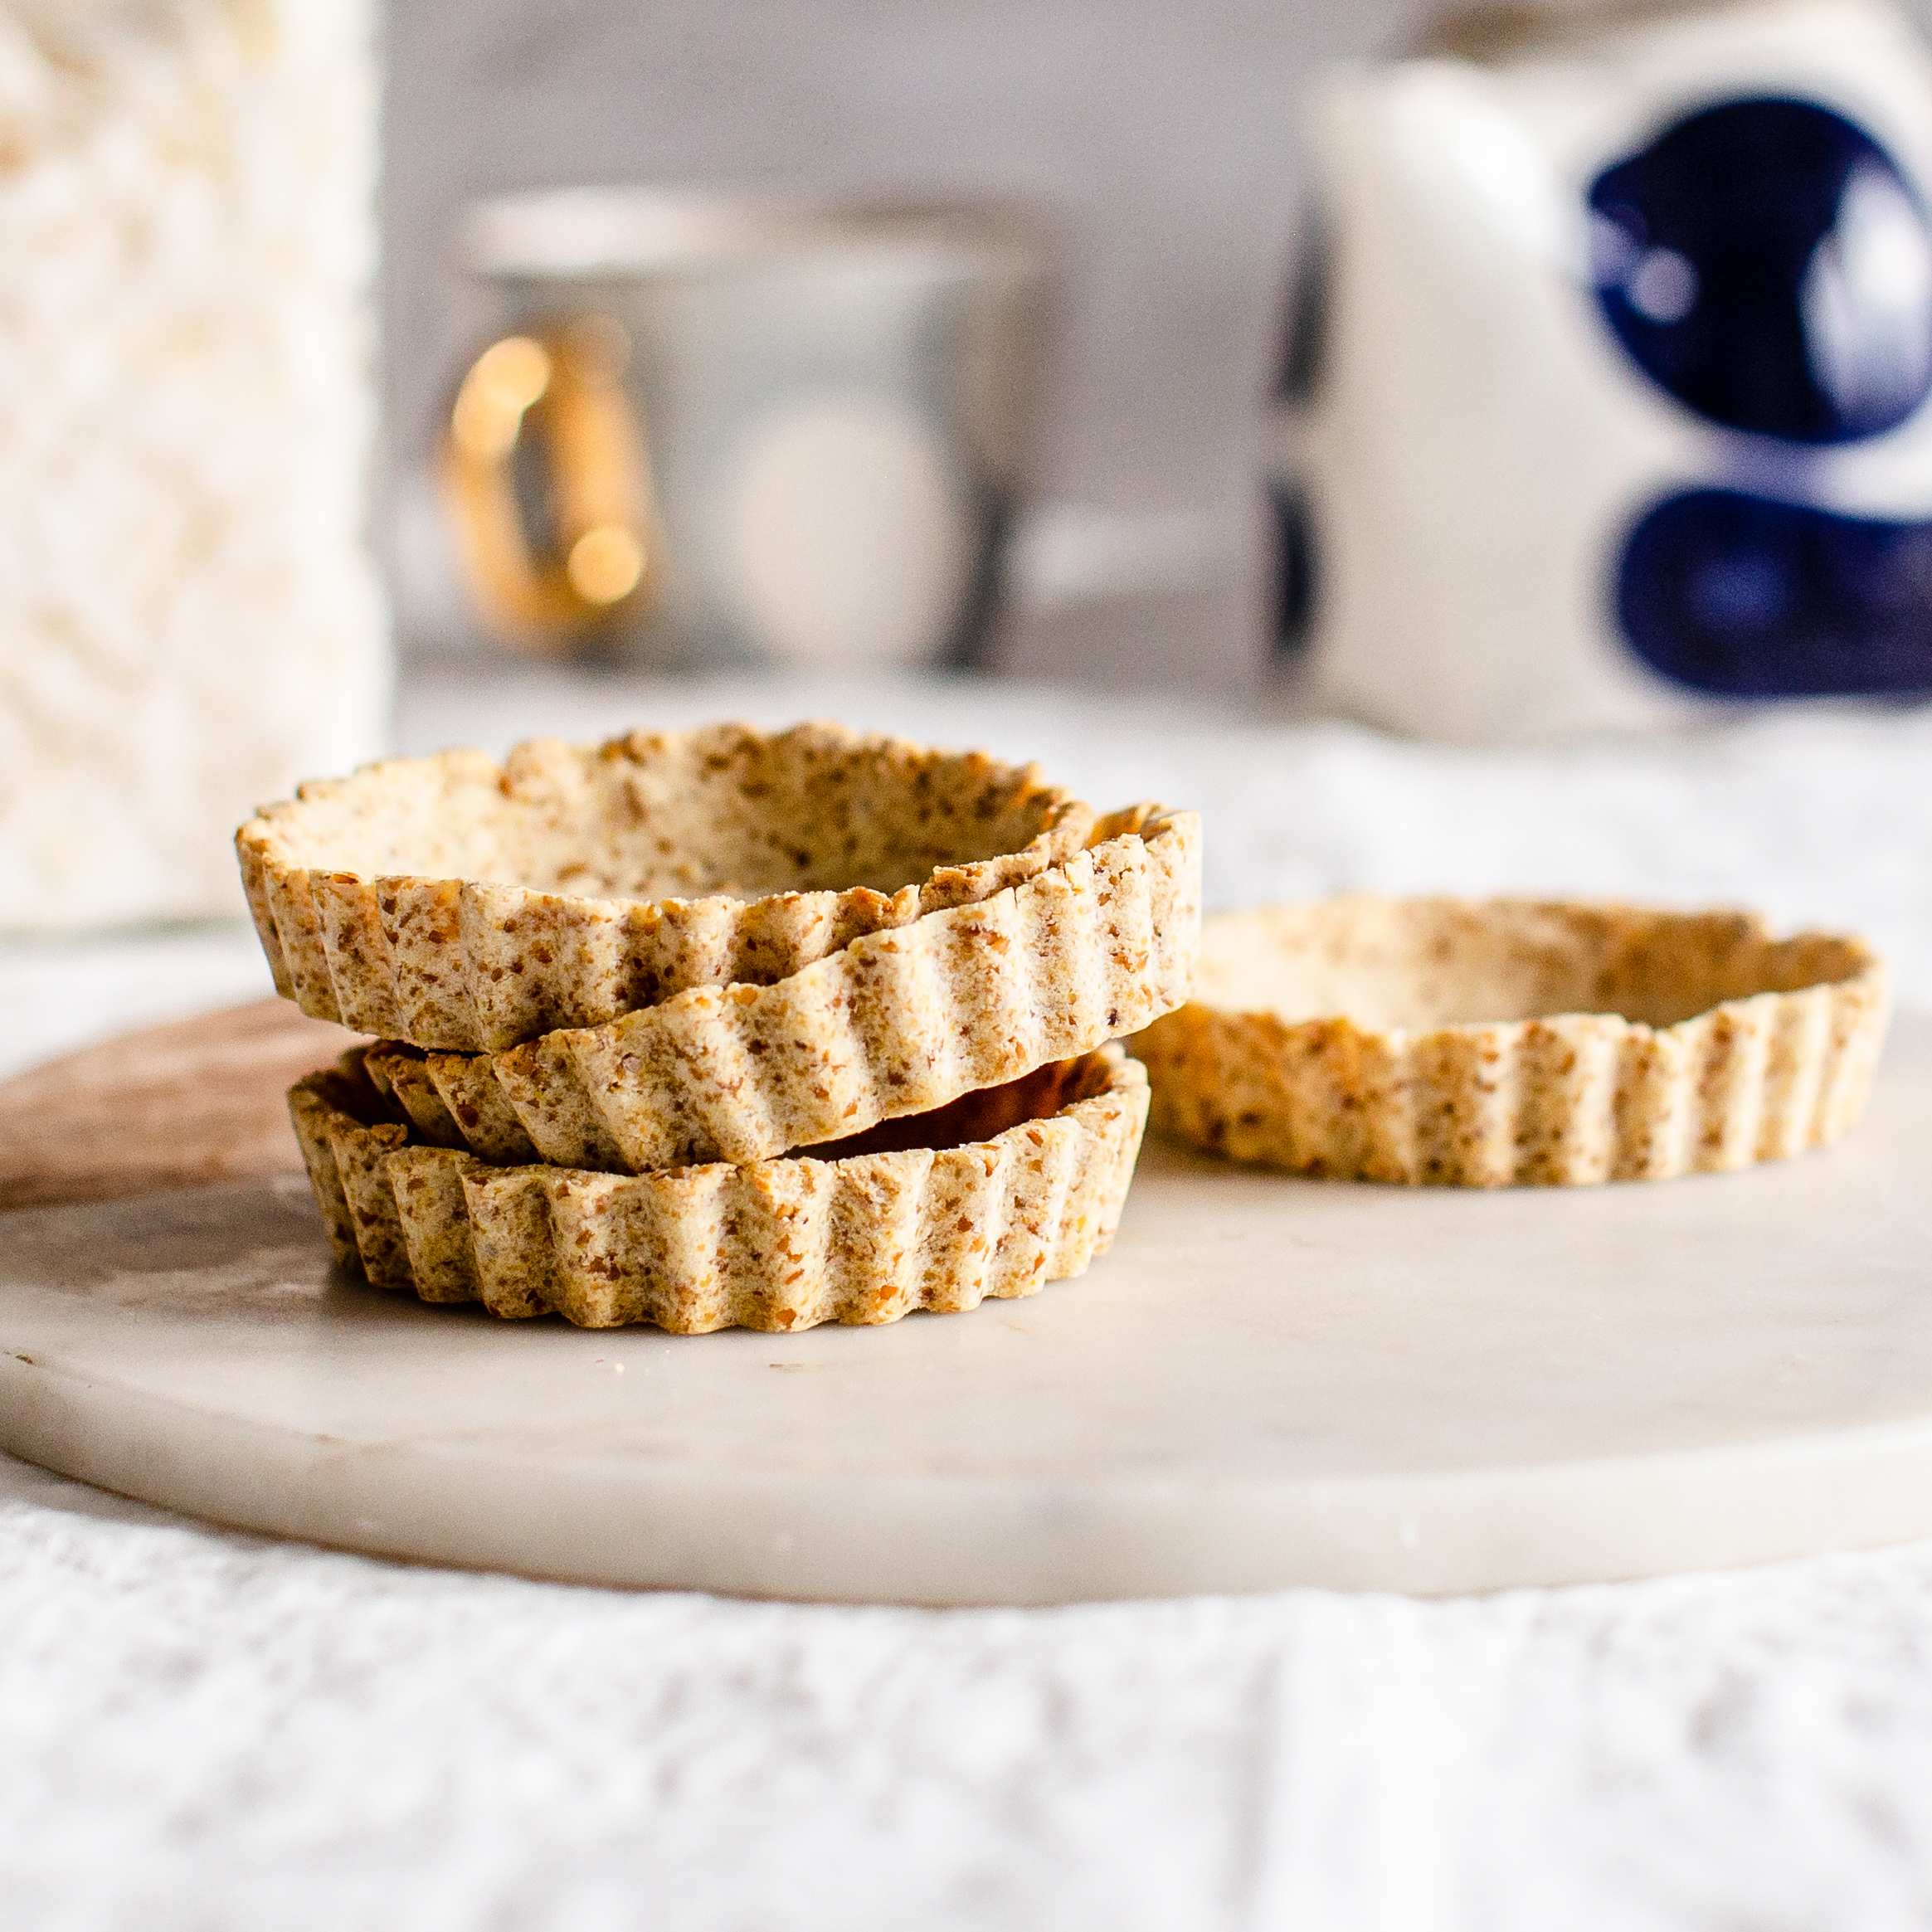
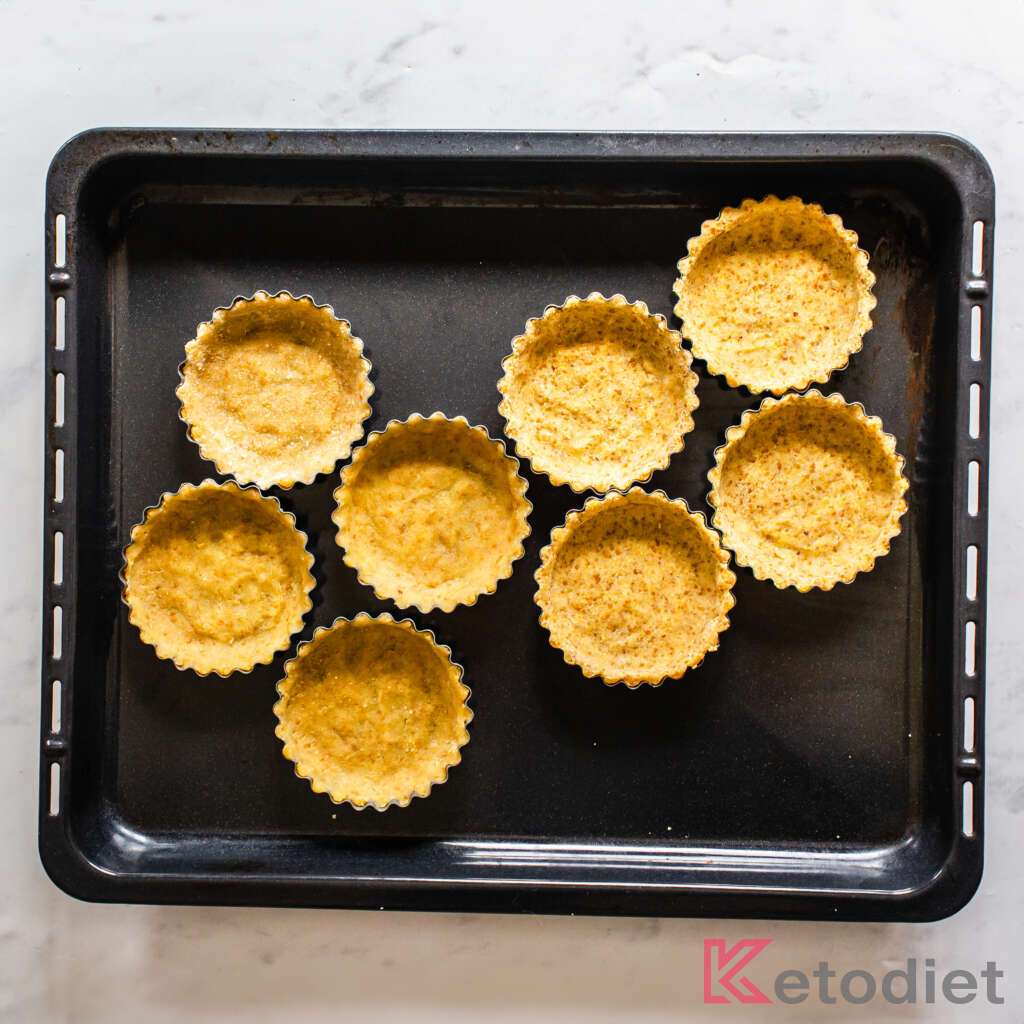
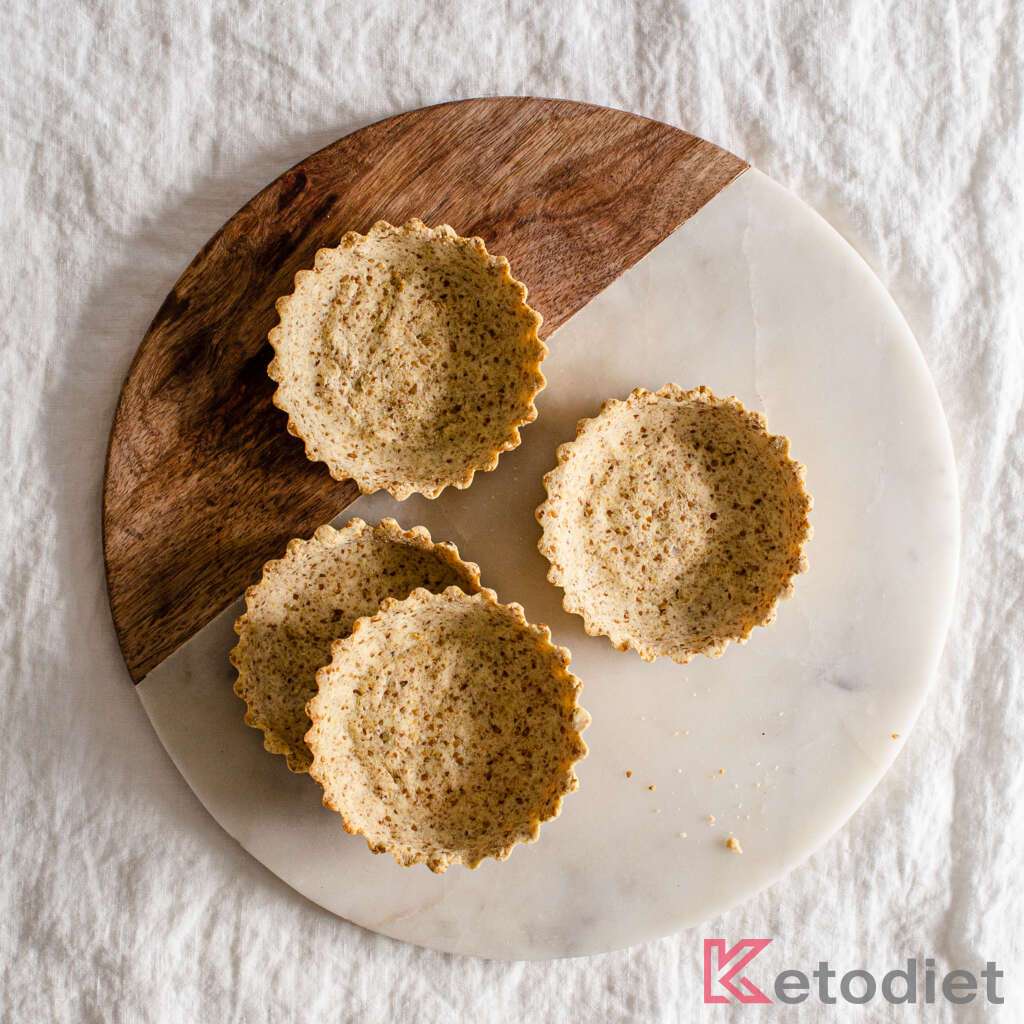
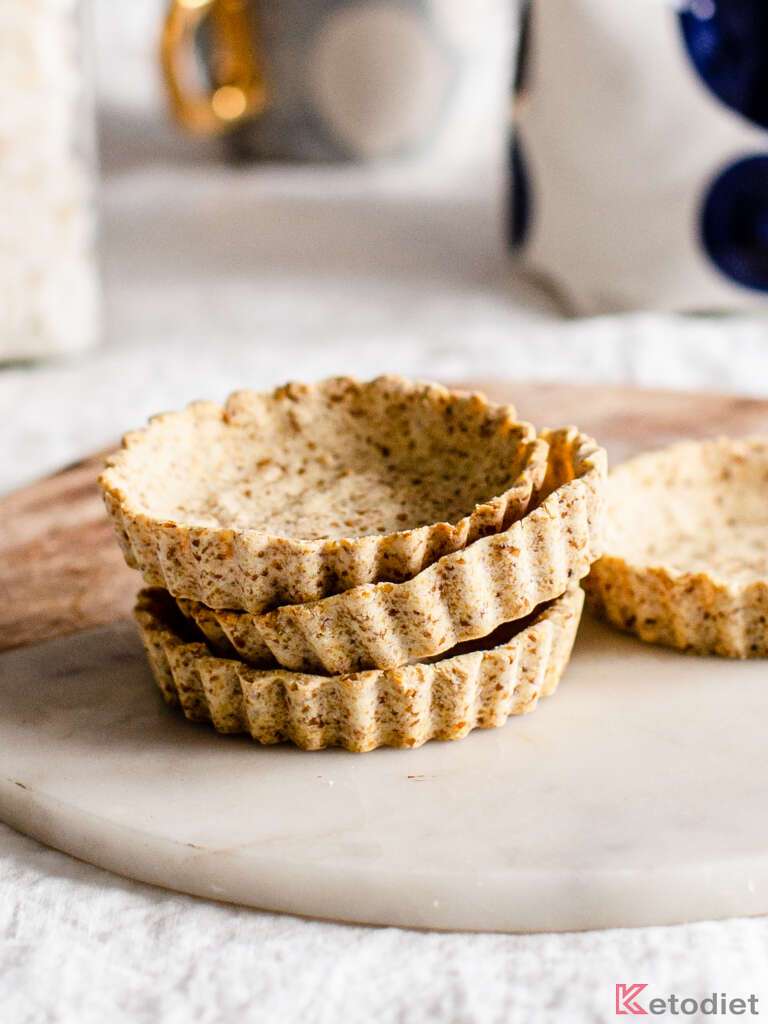
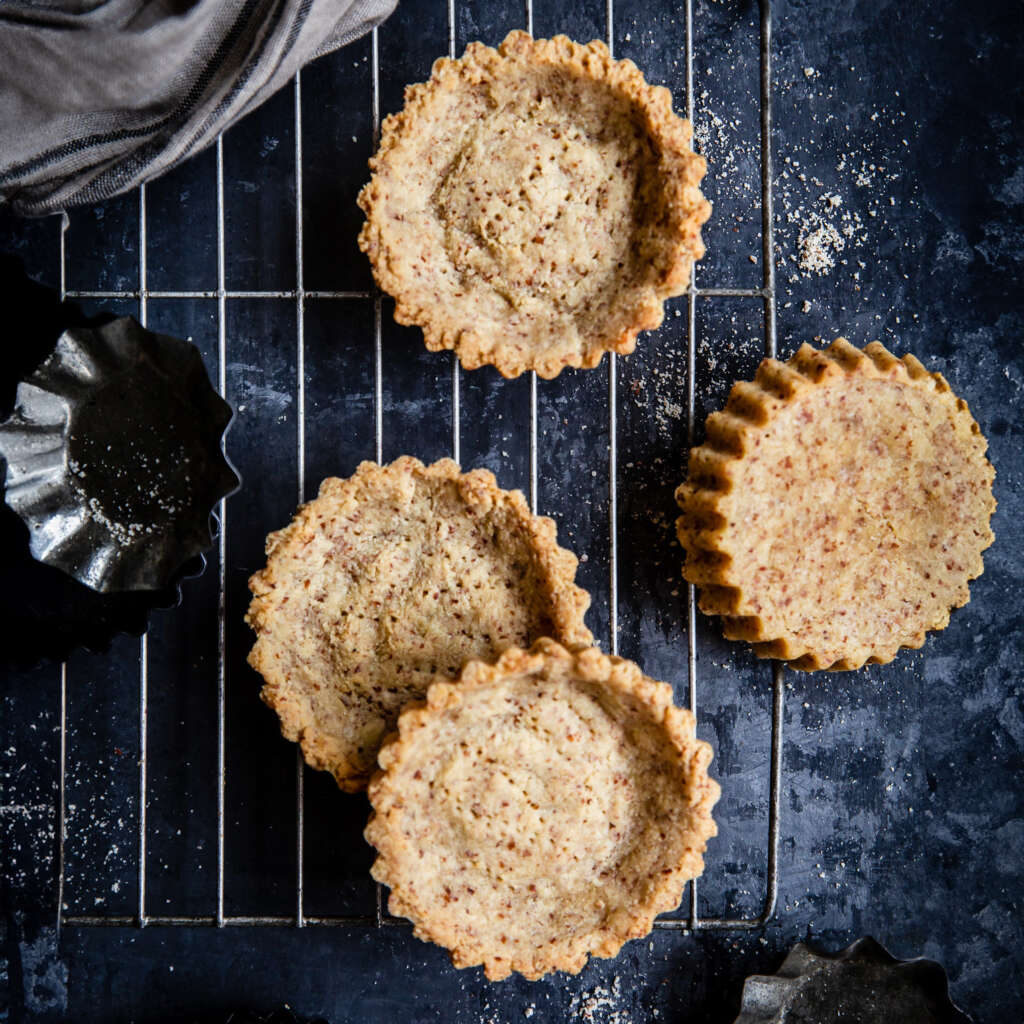
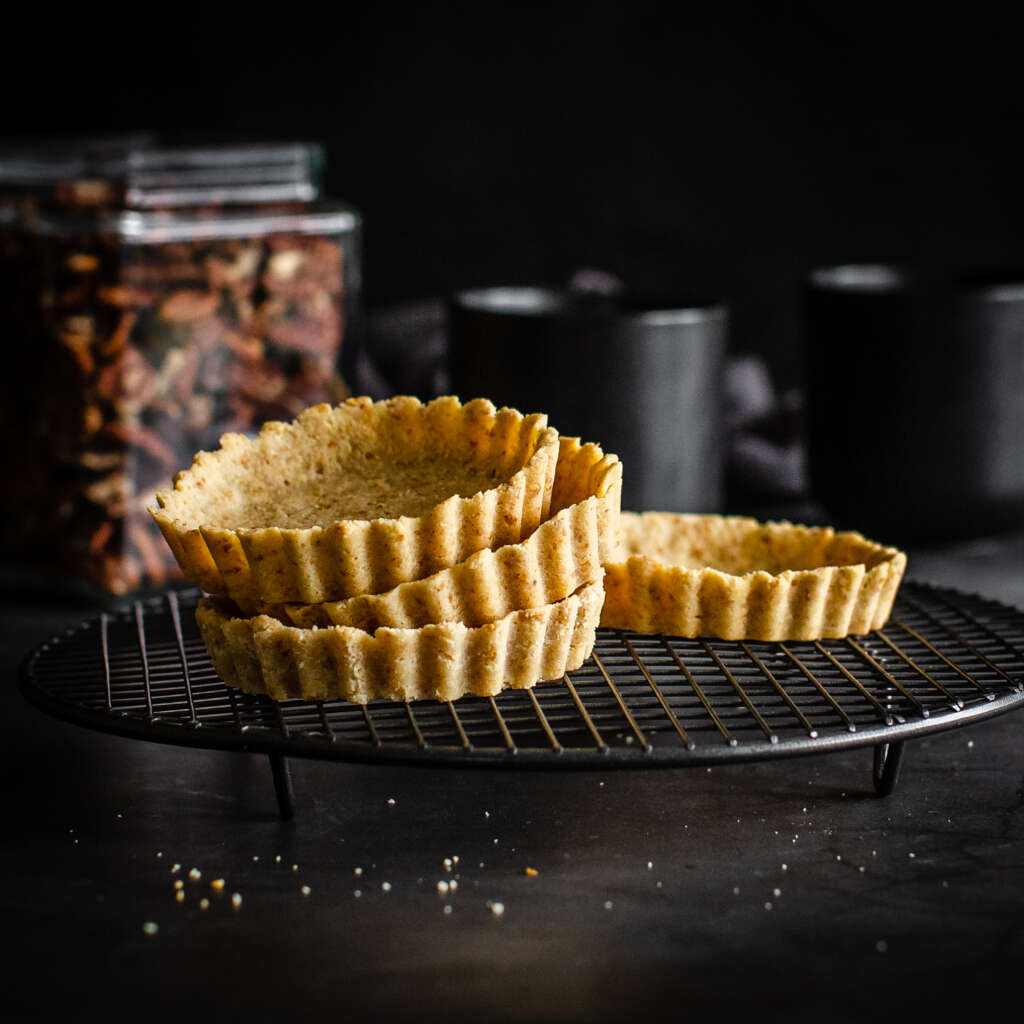
Shape and Bake. Grease a 9-inch (26 cm) tart pan or your choice of smaller pans. Press the dough evenly into the bottom and up the sides of the pan. Place the pan on a baking tray and transfer it to the oven. Bake for 8 to 12 minutes, rotating the tray halfway through to ensure even cooking. Once it’s golden brown, remove it from the oven and allow it to cool on a cooling rack before filling.
Tips for the Best Pie Crust
- Measure Accurately: Be precise with your coconut flour and flax meal measurements since coconut flour is particularly absorbent and can affect the dough’s consistency.
- Room Temperature Ingredients: Ensure your butter and eggs are at room temperature to mix evenly for a smooth, pliable dough.
- Even Pressing: Press the dough firmly and evenly into your pie pan to avoid a crust that’s too thick in some spots and too thin in others.
- Chill Before Baking: If time allows, chilling the shaped crust in the fridge for about 15 minutes before baking can help it hold its shape and prevent burning.
- Use Baking Beans: If using a large pie pan, consider using baking beans to weigh down the dough and prevent air bubbles.
- Watch the Oven: Keep an eye on your crust as it bakes, as ovens can vary, and you want to prevent over-browning. If your oven doesn’t bake evenly, cover with a piece of parchment paper to avoid burnt parts.
Storage Instructions
You can store it at room temperature for up to 3 days, or in the fridge for up to a week.
Yes! For longer storage, you can store it in the fridge for 2 weeks, or freeze it for up to 3 months.
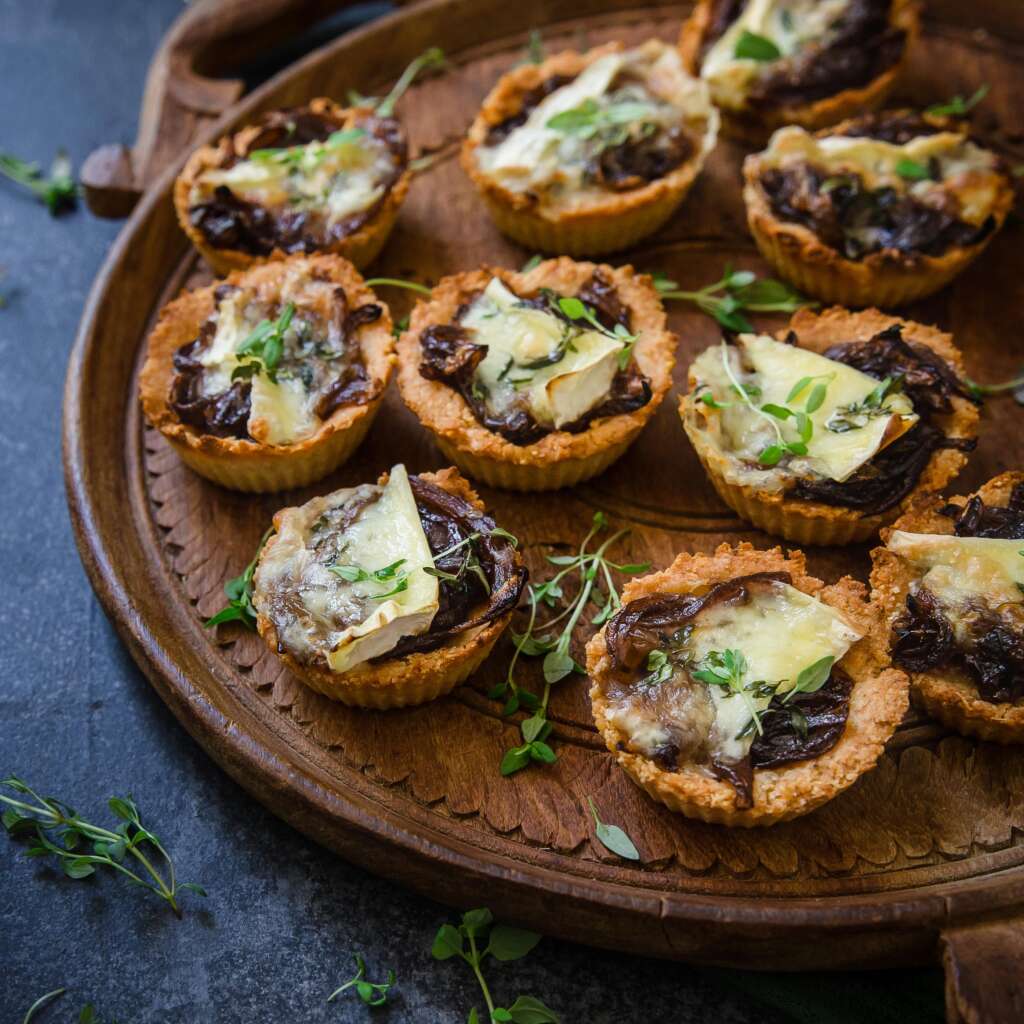
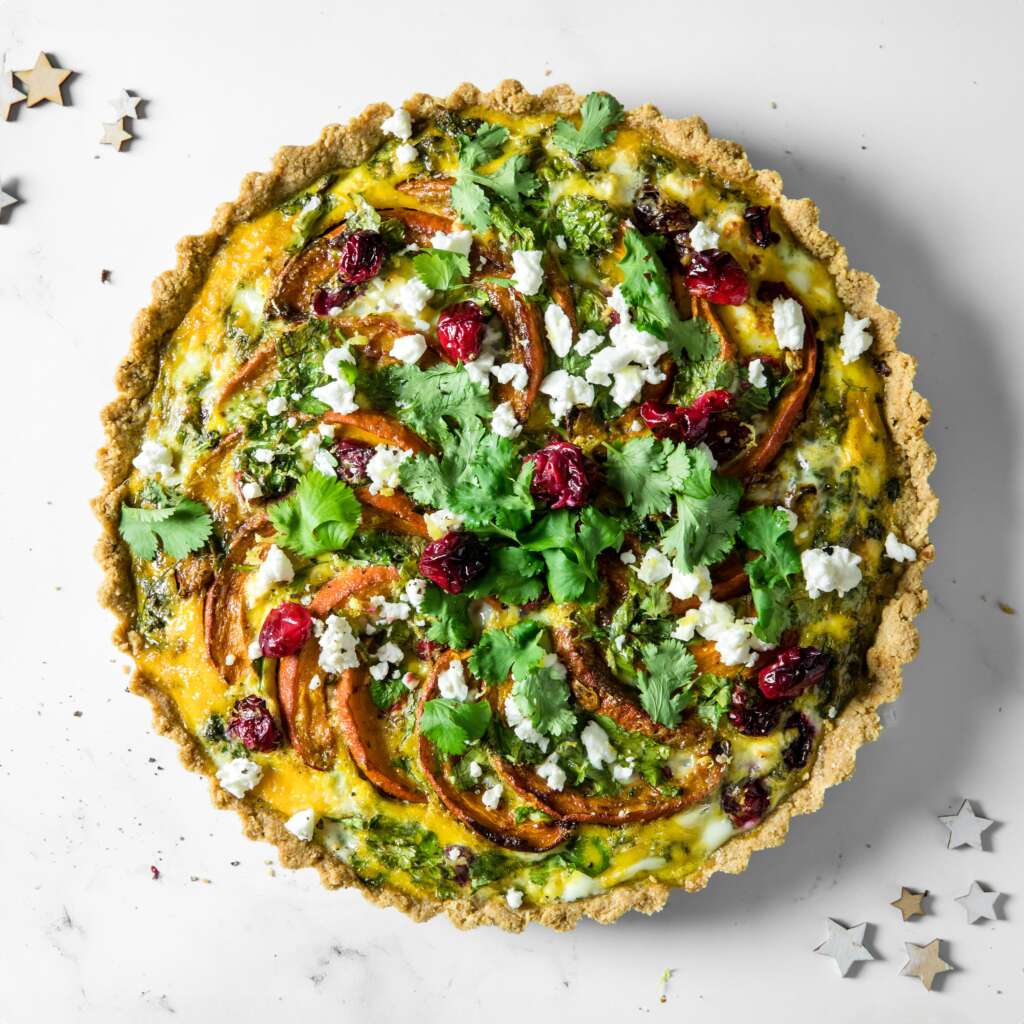
How To Use Keto Nut-Free Pie Crust
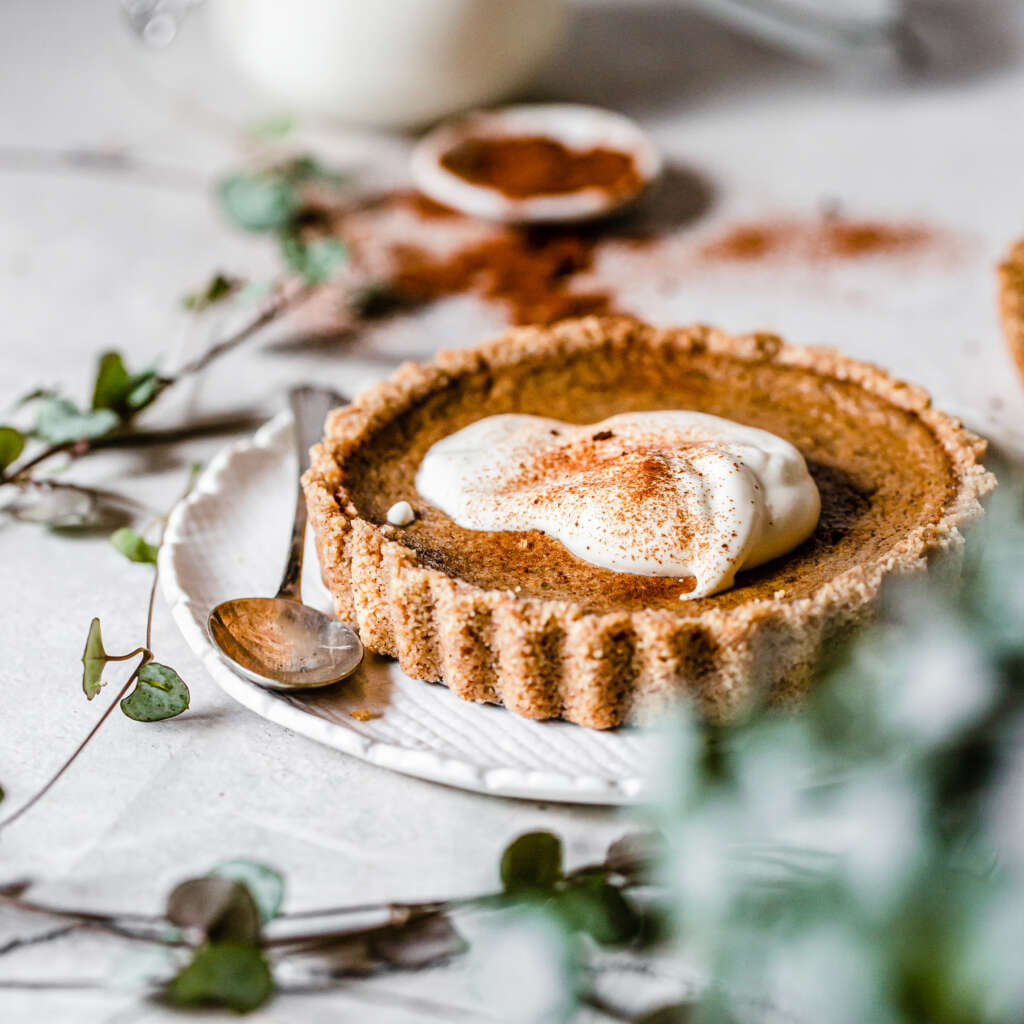
This pie crust is not just for sweet pies; it’s great for savory dishes too. It’s sturdy, tasty, and even works well with no-bake fillings. Try it in our classic Pumpkin Pie or Zucchini Apple Pie!
While it may not have the flakiness of our flakey 5-Ingredient Keto Pie Crust made with almond flour, it more than makes up for it in flavor and sturdiness. It’s perfect for no-bake fillings as well, giving you endless possibilities for your next meal or dessert.
Tools for This Pie Crust Recipe
- Pie Pan: One 9 inch (23 cm) pie pan, or eight 4 inch (10 cm) mini pie pans.

Keto Nut-Free Pie Crust
Ingredients
- ¾ cup coconut flour
- ½ cup flax meal
- pinch of sea salt
- ½ stick unsalted butter (ghee or coconut oil)
- 2 large eggs
Instructions
- Set your oven to
 320 °F (160 °C), or 355 °F (180 °C).
 - In a mixing bowl, combine the coconut flour, flax meal, and a pinch of sea salt.
- Add the softened butter along with the eggs. Mix until a thick dough forms.
- Grease a 9-inch (23 cm) tart pan or your choice of smaller pans. If using a large pie pan, line the bottom with a 9-inch (23 cm) round piece of parchment paper.
- Press the dough into the bottom and up the sides of the pan. If using a large pie pan, consider using baking beans to weigh down the dough and prevent air bubbles.
- Place the pan on a baking tray and transfer it to the oven. Bake for 8 to 12 minutes, rotating the tray halfway through for even cooking.
- After baking, place the tray on a cooling rack. Once cool, carefully remove the crust from the pan. You may use a sharp knife to gently release the crust if needed.
Nutrition
Notes
- Serving Size: ⅛ large pie crust, or 1 mini crust.
- Storage Tip: Store the baked pie crust at room temperature in a covered container for up to 3 days. For longer storage, keep it in the fridge for up to 2 weeks or freeze for up to 3 months.
- Pan Choice: Opt for non-stick pie pans with removable bottoms for easy release.
- Parchment Paper: If using a large pie pan, line the bottom with a 9-inch round piece of parchment paper for easier removal.
- Dairy-Free Options: If you’re lactose intolerant or prefer a dairy-free alternative, you can easily swap out the butter for ghee, which is generally well-tolerated, or coconut oil.

This pie crust is genius for nut allergies – so excited to try it! Do you think using coconut oil influences the taste a lot? 😊
Hi Emma, In my experience, it does not, especially if you add toppings. There is a slight difference but it’s not noticeable for most people.
Just gave this a try, and it’s amazing and so easy! Love how the crust stays together. Works perfectly for my savory dishes, too!
Thank you, happy baking! 🙂